
Ah! It's finals time! On this journey to the land of finals ... I shall find the best pad thai in Westwood! Including frozen foods from Trader Joes and Ralphs ..
So long !
Monday, May 31, 2010
Wednesday, May 26, 2010
Good Ole Fashion Congee
If you feeling sick, down, or tired, some good ole congee shall make things feel better. When I was a kid, I would hate eating this when I was sick because it would give me some pretty bad stomachaches. Now, as a busy engineering student, I appreciate the texture and taste. I would call this somewhat, Chinese comfort food because it makes me feel like I'm at home again. In addition, this dish really makes people recover from colds.
Well, if your not sick, down, tired, this makes a quick and easy meal for breakfast, lunch, or dinner. The only thing you need are the side dishes that go with congee, such as Chinese pickles, wheat gluten, shredded pork, hot sauce, etc...
Note: this is not the delicious congee with 1000 year old duck eggs. I will make this when I find a ride to 99 ranch or ranch 99. How would you call it ... there's this discrepancy between FOBs and ABCs about how to say it in English, but that is another story....
Good Ole Fashion Congee

Note: I had shredded pork and wheat gluten with peanuts
Also ... I let the congee sit for awhile, so the cognee above is a bit drier than most congees
Ingredients
3/4 cup glutenous rice
5 cups water
1 tbs Sesame oil
Prep directions
1. Wash the rice until the water is almost clear
2. In the same rice container, add the sesame oil
3. Mix well and allow the rice grains to soak the oil for 30 minutes
4. Add 2 cups of water into the container and transfer the rice and water to a blender
5. Use the remaining water to rinse any remaining rice grains of the container into the blender
6. Now, you should have a total of 4 cups of water and the rice in the blender.
7. Pulse the blender for 3o seconds, until the rice grains are in smaller pieces. You can use a food processor for better control. You do not want all the rice to disintegrate into the water.
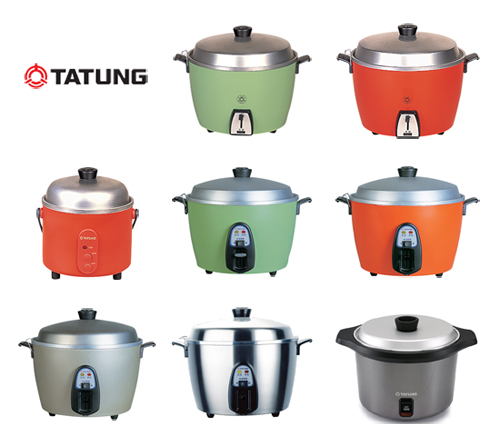
8. Transfer rice to rice cooker or steamer. I use something like this
9. Follow the instructions to how you normally cook rice.
10. For the stove top cooks .... cook the rice on the stove on medium low heat until the rice resembles congee ...
11. Serve with your favorite stuff xD
Well, if your not sick, down, tired, this makes a quick and easy meal for breakfast, lunch, or dinner. The only thing you need are the side dishes that go with congee, such as Chinese pickles, wheat gluten, shredded pork, hot sauce, etc...
Note: this is not the delicious congee with 1000 year old duck eggs. I will make this when I find a ride to 99 ranch or ranch 99. How would you call it ... there's this discrepancy between FOBs and ABCs about how to say it in English, but that is another story....
Good Ole Fashion Congee

Note: I had shredded pork and wheat gluten with peanuts
Also ... I let the congee sit for awhile, so the cognee above is a bit drier than most congees
Ingredients
3/4 cup glutenous rice
5 cups water
1 tbs Sesame oil
Prep directions
1. Wash the rice until the water is almost clear
2. In the same rice container, add the sesame oil
3. Mix well and allow the rice grains to soak the oil for 30 minutes
4. Add 2 cups of water into the container and transfer the rice and water to a blender
5. Use the remaining water to rinse any remaining rice grains of the container into the blender
6. Now, you should have a total of 4 cups of water and the rice in the blender.
7. Pulse the blender for 3o seconds, until the rice grains are in smaller pieces. You can use a food processor for better control. You do not want all the rice to disintegrate into the water.
8. Transfer rice to rice cooker or steamer. I use something like this
9. Follow the instructions to how you normally cook rice.
10. For the stove top cooks .... cook the rice on the stove on medium low heat until the rice resembles congee ...
11. Serve with your favorite stuff xD
Monday, May 24, 2010
Simply Red Kale
It seems as if I have not posted on this food blog in awhile... my bad. Well, you can blame Blizzard for not having adequate servers for Starcraft 2... I guess that is my own problem for having a somewhat gaming addiction to the best game ever created to attract Asians, especially that one country with delicious BBQ. I'll have you guessing what that country is.
Anyways. I found some red kale that was sitting leftover from the CSA box that I got a week ago. Tell you the truth, I had no clue what red kale was. It does not even look like regular kale. When I first saw red kale in "What's in a Box this Week", I was expecting to see a red version of kale. Instead, I found a brittle looking green bunch.
Since I did not know what to do with it, I decided to keep it simple and easy.
Simply Red Kale

(Does that look red to you??)
Ingredients
10 leaves Red Kale
2 cloves Garlic
1/2 Yellow onion
1 tbs Butter (yum heart attack!)
1 tsp Brown sugar
1 tsp Salt
Preparation
1. Shred the red kale
2. Mince the garlic
3. Slice the onion
Cooking of simplicity
1. Melt the butter in a pan
2. Throw in garlic and onions and cook until onions are translucent
3. Toss in red kale and saute the kale for about 1-2 minutes
4. Add in brown sugar and salt and mix around until sugar dissolves
What can I say? There's quite an excellent aroma that comes out of the brown sugar and red kale combination. It tastes quite good for some odd reason. Tell me what you think.
Tuesday, May 18, 2010
Beet Couscous with Fava Bean Cream
Oh man! It has already been a week with my box of delicious vegetables courtesy of the South Central Farmers. What I have left are the following: fava beans, beet greens, 1 golden beet, 2 red beets, and chard. Today, I shall knock down another beet, fava beans, and beet greens, just like how my group demolished a truss for my bridge design course.
I was talking to a couple friends about beets, and how much I detest them. Apparently, the beet greens taste pretty good. In addition, they suggested eating the beets cold in salad. The problem is .... I am not really a salad person. Another thing that I can't stand is eating salad. I find it not exciting putting vegetables together in a plate and mixing it with your favorite dressing.
For a side note .... the other day, I made balsamic beets. Today, I decided to try them cold, straight out of the fridge. They were pretty delicious. Somehow the coldness alters the density and probably reconfigures the flavor cells (made up science) of the beet into something quite yummy. It tastes similar to the pickled cucumbers that Chinese people put with their cognee.
Anyways, enough talking... Time to get to the main portion of this post. I decided to make a more complex dish with most of the remaining ingredients. The time it takes is about 1 hour to make it.
Beet Couscous with Fava Bean Cream

Ingredients for Couscous and Tofu
1 1/2 cup Couscous
2 cups Stock (vegetable, chicken, fish, your choice)
1 large Red beet
1 Yellow onion
1/2 cup White kidney beans
7 Beet greens
1 Bay leaf
4 oz Firm tofu
4 cloves Garlic
2 packs Raisins (about 2 oz)
Salt and pepper
Ingredients for Fava Bean Cream
1/2 cup Fava beans
1/2 cup Stock (vegetable, chicken etc.)
1/4 cup Half and half
1 tsp Thyme powder
Juice from 1/2 a lemon
Salt and pepper
Preparation and cooking <- important to read it all before you start if you want to cut time. This recipe requires a lot of management
Tofu
1. Preheat oven to 370F
2. Begin to boil water in a pot
3. Cut tofu into cubes
3. Line sheet tray with parchment paper and line tofu onto the paper
4. Salt and pepper tofu
5. Toss in the oven and set bake time to 20 minutes
6. When the tofu is done, leave it in the oven to keep warm
Beet couscous and other misc prep work
1. Wash beet greens and shred them and place into a bowl
2. Dice onions and place into a bowl
3. Setup food processor
4. Your water should be boiling by now, throw in fava beans and cook for 6 minutes
5. Coarse chop the beets and throw into the food processor.
6. Operate food processor until the beets look like tiny pieces about 2 mm in size
7. Heat oil in a pan and toss in onions, bay leaf, raisins, and beets
8. Cook until onions are translucent on medium low heat. (1 minute)
9. Add in couscous and cook until couscous is lightly browned (2 minutes)
10. Add in stock, cover, and cook for about 20 minutes, stirring occasionally.
Fava bean sauce process (10 minutes)
1. While the couscous is cooking, remove the fava beans and begin removing them from the shells (5 minutes)
2. Wash food processor and throw in the fava beans, half and half, chicken stock, thyme powder, and lemon juice.
3. Blend well and transfer to sauce pan (2 minutes)
4. Cook the sauce until it is hot and reduce until sauce-like consistency (3 minutes)
5. Salt and pepper to taste.
Beet Greens (3-5 minutes)
1. In another pan, add in oil and wait for it to get hot
2. Add in garlic, beet greens, white kidney beans, salt, and pepper
3. Cook for 2-3 minutes until leaves are tender
Assembling it all together!
Now, check up on your couscous to see if it is tender and firm to bite. If it isn't, add a little more stock if there is no more liquid left in the pan and cover to cook a little longer. REMEMBER TO KEEP STIRRING after every 3 or so minutes so you don't burn the bottom.
To plate:
1. Place sauce on the bottom of the bowl or plate.
2. Use a ring cutter and add couscous
3. Top with beet greens, beans, and tofu
Well, that was probably the longest post and probably one of the most complex things I've made. The whole combination of all these things is quite delicious. Enjoy trying to recreate this dish xD.
Monday, May 17, 2010
Beet chips with Spinach Artichoke Dip
One beet down, time to beat down another beet. During class, I was thinking about how to conquer another beet into a delicious dish. The other day, my friend Cynthia was talking about artichokes, which lead to a conversation with my co-workers about spinach and artichoke dip and how it goes well with chips. Then bam! That would knock out the spinach, artichoke, and another beet from the CSA box. The beets can be turned into chips. It's like a triple kill.
Because I only had one artichoke, I grabbed from artichokes from Trader Joes and steamed the hearts for 30 minutes.
Beet Chips with Spinach Artichoke Dip

Ingredients for the beets
1 beet
Salt and pepper
Olive oil
Prep for slicing and slaughtering and cooking the beets
1. Preheat the oven for 370F
2. Peel the beets
3. Take a mandolin slicer or super ninja knife skills and slice the beets as thin as Lays potato chips
4. Line sheet tray with parchment paper
5. Lay sliced beets spaced apart on the tray
6. With a spray bottle, spray olive oil onto the beets
7. Bake the beets for 8-10 minutes.
8. Remove from the tray and cool in a bowl.
Creating Spinach and Artichoke Dip
Ingredients
5 Artichoke hearts
5 oz Spinach
2 oz Light cream cheese
2 oz Cheddar cheese
3 cloves Garlic
Salt and pepper
Directions
1. Cook spinach in water for 2-3 minutes.
2. Remove and dry the spinach
3. Coarsely chop the spinach with a knife.
4. In a food processor, add artichoke hearts, garlic, cream cheese, and cheddar cheese.
5. Pulse until artichoke hearts are well pureed with the rest of the ingredients
6. Mix with the spinach
7. Salt and pepper to taste
8. Place in the oven at 370F for 10-15 minutes or until bubbling.
Now enjoy this "healthy" snack while watching baseball or at a party for healthy people.
Carrot Muffins
I was browsing my Google Reader today and stumbled upon Cooking with Christine's Healthy Carrot Muffins. Because of the remaining carrots in my CSA box, I thought it would be a good idea to make a simple and easy breakfast item that is semi-healthy (sorry Christine, I sort of added more sugar and some butter xD). I also made mini muffins because oddly enough, I only have mini muffin trays.
Carrot Muffins
(Prep time: 5 minutes Bake time: 10-13 minutes)

(Mini muffins)
Ingredients
Dry
3/4 cup Grated carrots (about 3 carrots)
1/4 cup Carrots (food processor chopped coarsely, 1 carrot)
1 cup Quick cooked oats
1 cup Whole wheat flour (all purpose is fine too)
1/2 cup Brown sugar* (see note)
2 tsp Cinnamon
1/2 tsp Baking soda
1/2 tsp Baking powder
Wet
2 tsp Honey
2 large Eggs
1 tsp Vanilla extract
2 tbs Melted butter
1 cup Milk
Prepwork
1. Preheat the oven for 400F
2. Grate the carrots until there is 3/4 cup
3. In a food processor, chop the carrots until you have 1/4 cup of coarsely chopped carrots.
4. Mix all the dry ingredients together.
5. Beat the eggs well with the milk until some bubbles form
6. Add in honey and vanilla extract
7. Mix wet and ingredients together
8. Butter the insides of muffin tray
9. Place mix in muffin trays
Baking
1. Bake for 10-13 minutes in mini muffin trays, may take 20-25 minutes if you have large muffin trays
2. Cool on a rack and enjoy with a glass of milk
Notes: According to my friend Jeannie, these were not sweet enough, but I think they are just right. If you have a sweet tooth, like Jeannie, add about 1/4 cup more brown sugar.
Here's another picture:

Collard Greens Quiche
The other day, I went to Santa Monica with my friend Jessica to eat at a British tea house on Santa Monica and 2nd st called Tudor House. The restaurant offed various pies and afternoon tea menus. I saw that one of the specials was a quiche. I did not order it (shepherd's pie instead), but it inspired me to create a quiche over the weekend. Well, I decided to use the collard greens from the CSA box (click on the link if you don't know what CSA is). No it's not Chinese Student Association.
Collard Greens Quiche (for 6 in diameter baking dishes)

Ingredients
1/2 Basic pie dough (Approximately 1/2 lb)
2 Eggs
7 Stalks collard greens
2 tsp Garlic powder
3 oz Cheddar cheese
1/4 cup Milk
Pepper (Optional)
Prepwork and cooking
1. Preheat the oven for 375F
2. Finely chop collard greens into strips or pieces as seen in the picture
3. If you don't have shredded cheddar cheese, cut the cheese into 1 cm cubes
4. Beat the eggs with the milk.
5. Roll out the pie dough to fit your pie medium (I used a 6 in diameter Corningware dish because I don't have a tart mold or pie pan)
6. Fit the dough over the pie dish
7. Pre-bake the pie dough in the oven for about 10-13 minutes.
8. In a food processor, add the cheese and shred it finely.
9. Add cheese, eggs, garlic powder, black pepper (optional), and collard greens together and mix.
10. When 10-13 minutes is up, add the egg mixture into the pie dough to fill just about the crust edge of the pie as seen in the picture.
11. Bake in the oven for 10-15 minutes or until the egg is firm.
Yum, this quiche is quite good. I never knew that collard greens would go so well with eggs and cheese. Well, I'll probably be making more quiches in the near future.
Basic Pie Dough (very fast)
Yummy! Pie is considered to be a favorite among many people. In addition, it is extremely versatile. It can be used to make apple pie, meat pie, quiche, etc and a whole lot of things where you can let your imagination run wild... well, not that wild ><. I shall share with you my very fast, quick, and easy pie dough that can be used immediately.
Basic Pie Dough (makes about 1 lb)
Time it takes: 5 minutes with getting all the ingredients together and making it
Ingredients
1 cup Flour (all purpose or whole wheat, I used whole wheat cause it is healthier)
1/2 cup Butter (freezing cold)
1/4 cup Water (freezing cold)
1 tsp salt
Directions that are needed to be followed carefully
1. Cut butter into 1 cm cubes
2. Put in a bowl and toss in the freezer for 10 minutes
3. Meanwhile, put flour and salt in a food processor
4. Pulse for 20 seconds to mix well
5. After 10 minutes, take the butter and place in the food processor
6. Pulse on high for 30-45 seconds or until mix resembles small peas.
7. Transfer mix to a bowl
8. Slowly add freezing cold water about 1 tbs at a time and mix with the flour mix (you should be able to use almost 1/4 cup of it)
Note: if the dough becomes very sticky, add a little more flour (1 tbs at a time) until it can be workable.
9. Once dough forms and is semi-firm, you can throw it in the fridge to cool or roll it out for whatever your needs are.
Carrot Souffle with Balsamic Beets
Beets are my absolute worst enemy in cooking. I really do not know what to do with them. I hear that they are full of good carbohydrates, protein, and other healthy stuff, but man, they have some pretty weird aftertaste. Since I got it in the CSA box, I shall not be wasteful and throw it out. Here goes beet number 1 and 3 carrots....
Carrot Souffle with Balsamic Beets

(looks like a drink)
Ingredients
1 Beet
3 Carrots
1/4 cup Balsamic vinegar
1/4 cup flour
1 tbs Brown sugar
1 oz Light cream cheese
2 tbs Romano cheese
2 Egg whites
Batch of basil for garnish
Black pepper (a dash)
Prep and cook the carrot souffle!
1. Preheat the oven for 350F
2. Peel the carrots
3. Toss in a pot of boiling water until tender
4. Strain, dry, and chop until it can fit in your food processor
5. Puree the carrots with the cream cheese and Romano cheese
6. Beat egg whites until peaks form
7. Fold in carrots, sugar, pepper, and flour into the egg whites
8. Place souffle mixture into ramekins or ovenproof dish
9. Bake for 20-30 minutes until top is golden
Meanwhile ....
Prepwork for the beets
1. Peel and cube beets into 1 cm cubes
2. Shred the basil
Cooking process
1. Heat a little olive oil in a pan
2. Saute the beets for 2-3 minutes with salt and pepper
3. Add in balsamic vinegar and cover for 2 minutes or until beets are cooked.
4. Wait for the souffle to finish and then put balsamic sauce and beets over the souffle with basil garnish.
I got to say ... this is quite an interesting dish that could use some improvement. If you have any ideas of how to make this taste more interesting, let me know xD!
Sunday, May 16, 2010
Pesto with Kale and Beans
As mentioned before, I got a large box of random vegetables from the local Community Sustainable Agriculture (CSA) something something .... What I do with all these leafy items is going to be a mystery and quite a challenge.
To start off with my CSA Box of Random Vegetables, I decided to first use kale because I am pretty familiar with that vegetable.
I don't know why, but I have held off on making pesto for the longest time. I was never a big fan of pesto because of the amount of oil that pools over on the bottom of the plate after eating a big plate of noodles. Due to its simplicity, my love for Italian food, and request from people who are hungry.
Pesto with Kale and Beans

Ingredients
3 cups Basil
2 cloves Garlic
1/2 cup Extra virgin olive oil
1/4 cup Pine nuts
1/4 cup Romano cheese (Finely grated, powdery one)
1/4 cup White kidney beans
4 leaves of Kale
1/2 lb Noodles
Prep
1. Put basil and garlic in the food processor
2. Blend nicely until basil leaves are finely chopped
3. Add in pine nuts and finely chop in the processor
4. Mix oil and cheese together
5. Slowly drizzle the oil and cheese mix while processor is running (most food processors have a liquid drip attachment at the top)
6. Coarsely chop kale
Cooking
1. Throw in noodles in the boiling water
2. Remove noodles from water and throw kale into the water (cook kale for 4 minutes)
3. Heat up pan with a little oil and toss noodles in with pesto mix and kidney beans (cook for 5 minutes, constantly stirring)
5. Strain kale and mix with noodle and pesto mix.
Well enjoy! The pesto sauce can be made ahead of time and stored for about a week in the refrigerator.
Community Supported Agriculture
Community Supported Agriculture (CSA)
Vegetables ... ew disgusting, meat should be the way to go! Haha ... as they say...
Last week, I ordered a Community Supported Agriculture (CSA) box for 15 dollars and was thinking that I must be crazy to spend money on such a big box of vegetables. It is organically grown from the local South Central Farmers (http://scfcoop.southcentralfarmers.com/). Yay supporting local farming!
I heard about this through various friends, and they thought it would be an excellent challenge. So far, many of them have never used up all the vegetables because they always encounter two or three never seen before vegetables. They thought it would be a good idea to see what I can do with all these mystery vegetables.
So... I went to pick up my box of mystery on Wednesday from the local drop-off point (it's starting to sound like a detective story). My heart was beating as I carried it back to my apartment. What could be in this box? Is it peppers? Is it lettuce? Is it just a box of dirt? (side note: there was a lot of dirt coming from the bottom of the box <- yup freshness)
I slowly opened the box as if I were diffusing a mail bomb. To my surprise, there were several varieties of vegetables that I have used before. I shall list them:
Kale - 5 oz
Carrots - 11 oz
Spinach - 5 oz
Red kale- 11 oz
Red beets - 3
Yellow beets - 1
Artichoke - 1
Fava Beans - 6 oz
Broccoli - 8 oz
Red cabbage - 1
Collard greens - 7 leaves
Well, time to go crazy and head to my kitchen of experimentation... but before that, I must spend the time to wash all these dirty vegetables with small miniature protein still attached (bugs).
Wednesday, May 12, 2010
What are essential ingredients in my pantry?
The other day, my co-workers were interested in the essentials in my kitchen that I absolutely must have or else all hell will break loose. Well, below is an image of my giant spice cabinet, and no, you do not need every single one of those dried herbs and spices. Whatever is in there are items that I would maybe use once or twice or bought because I thought it was interesting and may save for some mysterious creation.

So... let me begin with flavoring agents that I must have....
1. Onions - ah the tears!
2. Garlic - scare vampires away
3. Wine - red and white cheap wines from Trader Joes
4. Garlic powder - in case im too lazy to mince my garlic
5. Soy sauce - every Asian requirement
6. Salt - for the high sodium content in your bloodstream
7. Pepper - for throwing at bad guys trying to get you
8. Red chili powder - just kicks up the flavor a notch
9. Corn starch or flour for thickening sauce
10. Butter - because it tastes so good!
11. Eggs - essential for quick meals or a snack.
With those items, well... you can make amazing things!
Curried Mustard Greens
Once again, I have another foreign ingredient from Ralphs. Once again, it is green and very leafy like all my other vegetables, but it has a distinct smell and texture to it. It was mustard greens, and I definitely did not know what to do with it.
I could have sauteed it in butter and garlic like what I typically do with all my vegetables and throw it as some sort of side dish, but for the mustard greens. I wanted to make it the star of my dinner.
My Indian friend told me that mustard greens can be combined with tomatoes and make some sort of curry with the right assortment of spices. He did not know exactly what those mysterious spices were. Instead, I thanked him for the idea and proceeded to start a mad science experiment with my spice cabinet.
Curried Mustard Greens

Ingredients
1 batch Collard greens (10 leafy goodness)
1/2 cup Plain yogurt
1/2 small Yellow onion
1/4 cup half and half
1 tbs Garam masala
1 tbs Curry powder
1 tbs Coriander powder
1 tsp Grated ginger
1 can Tomato paste
2 tbs Butter
3 cloves garlic
Salt and pepper
Prepwork
1. Boil water
2. Wash and finely chop the mustard greens
3. Finely dice the onion and garlic
4. Grate the ginger into a paste
5. Throw mustard greens in the boiling water for 5 minutes to allow it to cook
6. Drain the mustard greens
Instructions of mystery
1. Add butt into a pan
2. Toss in garlic, ginger, and onion and cook for about 1 minute or until onions are translucent.
3. Add tomato paste, half and half, and yogurt.
4. Mix well and add garam masala, coriander, and curry powder
5. Add in mustard greens and cook for 4 minutes
In those 6 simple steps, you make a great dish that might make your whole apartment smell like spices xD.
Bets served with my Asian favorite: rice ...
Monday, May 10, 2010
Sweet and Sour Tofu
It's another one of those Mondays. I'm still a bit tired from pulling up all nighters on the weekend, so I decided to miss one of my classes to nap and study for my thermodynamics midterm that's tomorrow. In addition, I decided to keep dinner quick and simple.
I picked up tofu at Trader Joes because I feel that I haven't really worked with tofu before. The hard part was to decide what to do with it, then woosh, out of nowhere, some reckless individual bumped past me almost spilling his McDonalds chicken nuggets and sweet and sour sauce all over me. An idea occurred to me... Bake it with sweet and sour sauce!
Sweet and Sour Tofu

Ingredients (Tofu)
7 oz Firm tofu
Prepwork (2 minutes)
1. Cut the tofu into any way or shape you want. I decide to cut mine into bread-like slices and triangle because triangles are cool.
2. Preheat oven for 350F
3. Line Parchment paper on the tray
4. Arrange the tofu evenly spaced out
Cooking the tofu
1. Bake the tofu for 15 minutes on each side (Total time: 30 minutes)
Ingredients for the sauce
3 tbs Sugar
2 tbs Rice vinegar
2 tbs Ketchup
1 1/2 tbs Water
1 tbs Soy Sauce
1/4 small Yellow onion
Prep
1. Mix all the ingredients together except for the onion
2. Finely dice the onion
Cooking
1. Heat a little oil in a sauce pan
2. Add onions and cook until translucent
3. Add liquid mix to the pan on low heat
4. Stir and heat until everything is well mix and sauce-like. (1 minute)
Take the tofu out of the oven and eat with rice. The sauce can be drizzled over the tofu or used as a dipping sauce. If you want, you can also marinate the tofu in the sauce for a day and then bake it.
Sunday, May 9, 2010
Eggplant and Cucumber Noodles
Leftovers ... what do I do with half an eggplant, 1 cucumber, and onions? I can't just throw these almost expired vegetables in the trash because that would just be wasteful. Well, being an efficient engineer, I conjured up a noodle dish that tasted quite interesting. I'm thankful that noodles are so versatile and goes well with anything. Basically, if you have the right herbs and spices, a wine, you can literally make several variations of noodles.
Eggplant and Cucumber Noodles

Ingredients
1/2 eggplant
1 Cucumber
1/2 Onion
1/4 cup White wine
4 oz Spaghetti noodles
2 cloves garlic
1 tbs Butter
2 tsp Paprika
2 tsp Dried oregano
1 tsp Chili powder
Salt and pepper
Dash of white truffle oil (optional)
Romano cheese
Preparation of being wasteful
1. Boil water
2. Finely dice the onion
3. Coarsely chop the eggplant and cucumber
4. Salt the eggplant and let it sit for 30-45 minutes
5. Rinse the eggplant
6. Chop the garlic
Cooking portion
1. Throw in noodles into the water
2. Heat up a pan with with
3. Add onion and garlic on medium heat
4. Wait for caramelization of onions (1-2 minutes)
5. Add eggplant and cucubmer and cook for 5-6 minutes
6. Add in paprika, chili powder, and oregano and stir around
7. Add in the white wine and allow the alcohol to evaporate (1-2 minutes)
8. Throw in the butter and mix well
9. Top with Romano cheese
10. Transfer noodles into a bowl and put in vegetable mix
11. Add a dash of truffle oil
Now that was simple! You can do some variations of this with your leftovers. It'll be good! Another thing, truffle oil really enhances the flavor of things, but don't add too much of it.
Saturday, May 8, 2010
Cheesy Eggplant with Poached Egg
Another mystery ingredient has appeared before me at the grocery store! Eggplant ... oh, it is so round, purple, and shiny, yet so bitter if cooked improperly. I have never cooked eggplant before. I rarely have it at all. My first hand experience with this vegetable has left me with a bitter impression.
According to The Clever Cook's Kitchen Handbook by David Joachim, eggplants should be best during early summers and should be stored in a cool place at room temperature. If you refrigerate then, they deteriorate faster.
Another tip to prevent bitterness and keep the eggplant from soaking up excess oil is to salt the eggplant after you have cut the eggplant for about 30-45 minutes. Afterward, rinse it well with water and dry to cook.
Cheesy Eggplant with Poached Egg

Ingredients
1 eggplant
6 oz Shredded cheddar cheese
1 oz Chopped parsley
Paprika
Red chili powder
Salt and pepper
Olive oil
6 Poached eggs
Ketchup for sauce
Prepwork
1. Preheat oven 400F
2. Slice eggplant into 1/2 cm slices
3. Salt slices and let it sit for 30-45 minutes
4. Rinse slices and pat dry
5. Line sheet tray with parchment paper
6. Line eggplant slices on the paper
7. Sprinkle salt, pepper, paprika, chili powder, and cheese on top of the eggplant (the chili powder level varies with how spicy you want it to be)
8. Drizzle olive oil over each slice sparingly
Cooking
1. Place in the oven until brown (25-35 minutes)
2. While it is in the oven make the poached eggs
3. Plate the egg plant over the egg and drizzle ketchup and sprinkle parsley over the entire dish
Well, enjoy a nice simple easy appetizer dish.
Friday, May 7, 2010
Chinese Collard Greens
The weekend is finally here! What shall I be doing? It's pretty obvious. I shall be studying for my last midterm on thermodynamics. I wish I could apply the 1st law and mass conservations while I'm cooking, but that would take too much brain energy.
There will be a marathon of posts today due to my lack of posting this entire week. The first thing I shall post is Chinese collard greens. Why is it Chinese? I don't exactly know, but it has a few Chinese elements in this dish; I could not think of a better name. If you have a better name, just tell me. Thanks!
Chinese Collard Greens

Ingredients
6 leafy Collard greens
1/2 cup Chickpeas
2 tbs Broad black bean paste
2 Garlic cloves
1/2 small Yellow onion
1 tsp Five asian spice
Preparation of greeness
1. Wash and remove the leaves from the stems of the collard greens
2. Chop the collard greens into 1 inch squares or shred them into 1 cm strips
3. Dice the onion
4. Wash the chickpeas
5. Smash the garlic cloves with the knife and peel
Cooking directionals
1. Add oil to a pan (about 1 tbs)
2. Add onion and garlic and cook for about 1 minute
3. Add collard greens and chickpeas and saute for about 1 minute
4. Throw in the bean paste and five Asian spices
5. Taste for flavoring.
Note: While cooking the collard greens, if no water is coming from the leaves, add about 1/4 cup of water when adding the collard greens to the pan
Well, time for a myriad of fun posts 1 down some more to go.
Wednesday, May 5, 2010
Vegetarian Mapo Tofu
I was thinking about eating something that my roommate has made that I haven't made in awhile or actually never made at all. That dish would be mapu tofu. I remember the first time he made this during the summer, it did not treat my tongue well due to the amount of chemicals drained into the little prepacked "mapu tofu sauce". After that experience, I would not eat mapu tofu again.
I decided to take up a challenge and make a good mapu tofu from scratch and without the aid of pork or beef. I got my inspiration after reading a manga called Super Cooking Boy or something like that. The meat that was made in the manga was actually just tofu that was fried to a crisp or until spongy. I guess time to tell you guys how to make your mouth on fire.
Mapo Tofu (Vegetarian Style)

Ingredients
14 oz Extra firm tofu
1/4 cup chickpeas
1/2 cup water
1 tbs hoison
1 tsp hot oil
2 tbs soy sauce
4 red chili peppers
2 tbs spicy broad bean paste
1/2 tsp Five asian spice powder
4 cloves garlic
1 tsp rice vinegar
1 tsp corn starch
salt
Ah pretty large ingredients list indeed...
Making the imitation meat

1. Mince or food process 7 oz tofu (or half the block)
2. Add about 2 tbs oil in a pan
3. Heat up the oil and throw in minced tofu
4. Put heat on medium high and stir rigorously
5. Use a spatula to constantly scrape the bottom to prevent burning
6. Add in vegetarian hoison sauce and spice power and continue to stir to prevent burning
7. Cook until the pieces become chewy like ground meat.
Making spiciness happen
Prep work
1. Chop chili peppers
2. Mince garlic
3. Cube tofu
4. Measure everything out before starting
5. Mix water with corn starch
Cooking up a heatwave
1. Add about 3 tbs of oil in a pan and red chili oil
2. Throw in chili pepper (more if you want spicier) to fry for 1 minute
3. Toss chickpeas and tofu in the pan
4. Saute for 2-3 minutes on medium high heat, making sure not to burn it by constantly stirring.
5. Add garlic, minced tofu, spicy broad bean paste, rice vinegar, soy sauce, and corn starch water
6. Stir and cook uncovered for 1 minute
7. Cover to cook for 3-5 minutes.
8. Add salt if necessary for taste.
I usually eat this with rice. Apparently the chickpeas were an accidental success. It gives the mapu tofu a distinct savory flavor that is difficult to describe, but it turns out very delicious.
Monday, May 3, 2010
Sorry ... gone on vacation
Sorry ... I have taken a short vacation to the Land of Midterms. This does not mean that I have stopped writing my quirky and weird recipes. I just don't have the time to upload them. After this week, I will be free and will be coming back with gifts of several recipes.
Subscribe to:
Comments (Atom)
